
How to Set Up a Proxy Video Editing Workflow for Smoother 4K Edits
If your timeline turns into a slideshow the moment you drop in 4K footage, the problem is not always your editing skills or your computer. For many creators, the real fix is a better proxy workflow.
This guide walks through how proxy editing works, when to use it, and how to build a repeatable setup that makes playback smoother, scrubbing faster, and editing much less frustrating.
Why proxy workflows matter for creators
Proxy media gives you lighter, lower-bandwidth versions of your original clips so your editing software does less heavy lifting while you cut. When you are editing YouTube videos, client interviews, podcasts with video, or multicam projects, that can make a huge difference.
A good proxy workflow helps you:
- Scrub through footage more smoothly
- Play back layered edits with fewer dropped frames
- Edit on a laptop or older workstation more comfortably
- Reduce lag when cutting long-GOP footage from mirrorless and hybrid cameras
- Spend less time waiting and more time making creative decisions
For a solo YouTuber or freelance editor, this is often the difference between feeling stuck in the software and actually staying in a creative flow.
What proxy media actually is
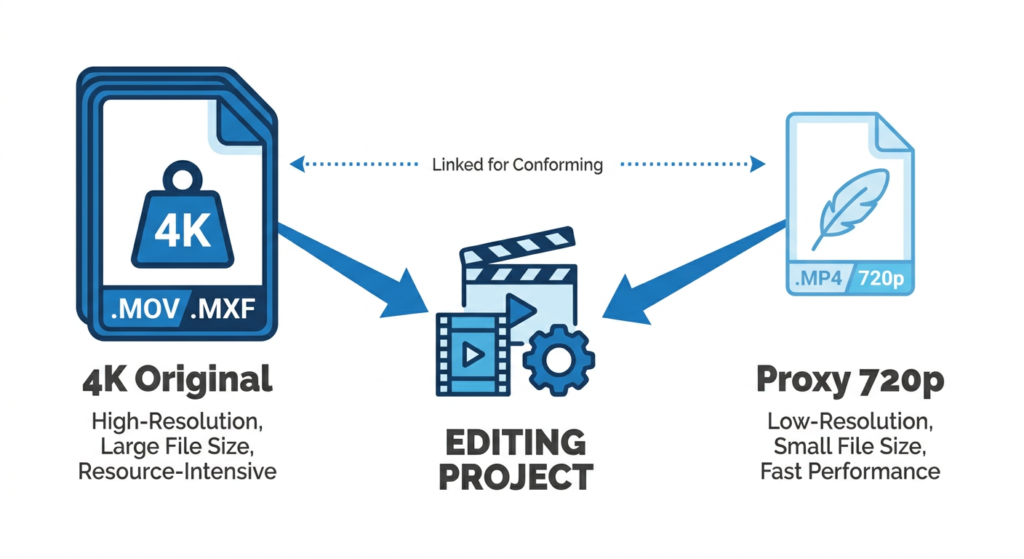
Proxy media is a smaller, easier-to-edit version of your source footage. Your editor temporarily uses that lighter file while you work, but keeps it linked to the original high-quality media for finishing and export.
That means you get the speed benefits of lightweight footage without giving up the quality of your final render.
It is also helpful to separate proxy media from a few related features:
- Proxy media: Separate lightweight files used during editing
- Optimized media: App-managed performance files created inside some editors
- Render cache: Temporary files created to help heavy effects play back more smoothly
- Timeline playback reduction modes: Settings that lower preview resolution without creating new media
These tools can overlap, but proxy media is usually the cleanest choice when you want a repeatable workflow across multiple projects or machines.
When you should use proxies
You probably do not need proxies for every project. But they are a smart move when you are working with:
- 4K, 6K, or higher-resolution footage
- 10-bit or RAW media
- Long-GOP codecs that are harder to decode in real time
- Multicam edits
- Projects with lots of color, graphics, or layered effects
- A laptop, travel setup, or older editing machine
A simple rule: if playback lag is making you change how you edit, it is time to try proxies.
A simple proxy workflow you can repeat on every project
Here is a practical workflow that works well for most creators.
1. Organize your footage before you start editing
Before you make proxies, clean up your media structure.
Create a project folder with clear subfolders such as:
FootageAudioGraphicsProject FilesExportsProxies
This sounds basic, but it prevents one of the most common proxy problems: broken links caused by moving files around mid-project.
If you work with multiple cards or multiple shoot days, label them clearly from the beginning. A little discipline here saves a lot of relinking later.
2. Choose a proxy format that is easy to decode
Your proxy files should be optimized for speed, not beauty.
In most cases, a good proxy file is:
- Lower resolution than the source, often 720p or 1080p
- Encoded in a format your system plays back easily
- Consistent across the whole project
Common choices include:
- ProRes Proxy for Mac-based and mixed professional workflows
- DNxHR LB for many Windows and cross-platform workflows
- H.264 proxies when storage is limited and your system handles them well
The best choice depends on your machine, storage speed, and editor. If you are unsure, start with a standard built-in proxy preset from your editing software instead of over-optimizing the settings.
3. Create proxies as part of ingest, not as an afterthought
The easiest proxy workflow is the one you do at the start of every project.
Instead of waiting until performance gets bad, create proxies during import or right after ingest. That way your project starts organized, and you avoid losing time halfway through the edit.
If you use Premiere Pro, Adobe’s official proxy workflow docs are a useful reference for ingest presets and proxy creation:
- Adobe: Ingest and proxy workflow — helpful for setting up automatic proxy creation when footage is imported
- Adobe: Create proxies — a straightforward guide to generating and attaching proxies
If you use DaVinci Resolve, Blackmagic’s documentation is useful for understanding how Proxy Media, Optimized Media, and Timeline Proxy Mode differ:
- Blackmagic Design: DaVinci Resolve new features guide — useful for understanding the role of proxy media versus other performance tools in Resolve
4. Keep your originals and proxies linked predictably
A proxy workflow only feels easy when your file structure stays stable.
Try to keep these habits consistent:
- Do not rename clips after proxies are created unless your editor handles that safely
- Avoid moving source media to a different drive in the middle of a project
- Store proxies in one dedicated location rather than scattering them
- Use the same folder structure for every job
If you are working with a team, agree on folder naming before anyone starts editing. Proxy workflows break fastest when each person organizes media differently.
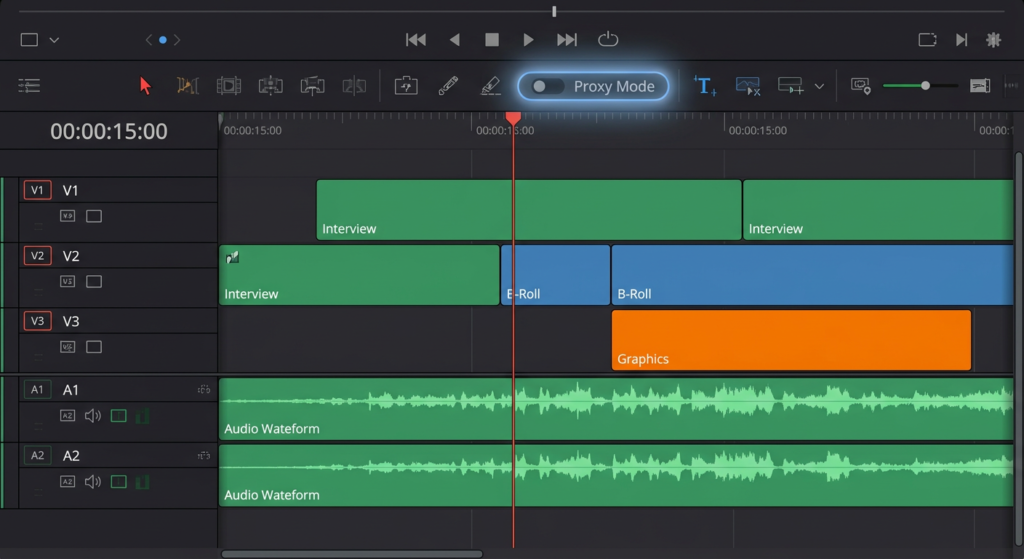
5. Edit with proxies on, review key moments with originals
Once your proxies are attached, do most of your cutting with proxies enabled. That is where you win back time.
But do not stay in low-res view for everything. Before final export, switch back to original media to check:
- Focus-critical shots
- Noise and fine texture
- Titles and graphics alignment
- Color accuracy
- Any VFX or cleanup work
This is especially important if you are working with product videos, beauty footage, or anything where detail really matters.
6. Finish from the source media, not the proxies
This is the final safety step.
Before exporting, confirm your software is using the original files for final output. Most modern editors handle this automatically when the proxy workflow is configured correctly, but it is still worth checking before you render a client delivery or upload.
A 10-second verification is much better than discovering later that your final export came from low-resolution preview media.
Practical tips for Premiere Pro and DaVinci Resolve users
Premiere Pro tips
If you use Premiere Pro, proxy workflows are especially helpful for creators editing mirrorless camera footage, screen recordings, or multicam interviews.
A few practical habits:
- Create proxies during ingest so the step is not forgotten
- Add the proxy toggle button to your Program Monitor if it is not already visible
- Use matching names and folders for better relinking behavior
- Test one short project first before applying a new preset to paid client work
DaVinci Resolve tips
Resolve gives you a few performance tools, so it helps to choose the right one for the problem.
- Use Proxy Media when you want dedicated lightweight files for editing
- Use Optimized Media when you want Resolve-managed performance help inside a local workflow
- Use Timeline Proxy Mode when you need a quick preview performance boost without generating new files
- Use Render Cache when effects, Fusion comps, or grading are causing playback issues
A lot of editors get better results when they treat these as separate tools rather than turning on everything at once.
Common proxy workflow mistakes
Even good editors lose time here when the setup is inconsistent. Watch out for these mistakes:
Making proxies too late
If you wait until the timeline is already a mess, creating proxies feels like extra work. Doing it up front keeps the project cleaner.
Using random presets on every project
When each project uses different proxy settings, troubleshooting becomes harder. Pick one or two reliable presets and stick with them.
Confusing playback settings with proxy files
Lowering timeline playback resolution can help, but it is not the same as creating real proxy media. If your footage is still hard to decode, playback settings alone may not solve it.
Moving files after linking everything
A stable file structure matters. Renaming folders or moving media between drives is one of the quickest ways to create relinking headaches.
Forgetting to check final output settings
Always verify that the final export is referencing source media before delivering the project.
A starter proxy checklist
If you want a simple system, use this checklist at the start of each project:
- Create a clean project folder structure
- Copy source footage into clearly labeled folders
- Decide where proxies will live
- Generate proxies during or immediately after ingest
- Confirm proxies are attached correctly
- Edit with proxies enabled
- Review important detail shots with original media
- Export from original files
This checklist is simple, but it creates the repeatability that most creators actually need.
Final thoughts
A proxy workflow is not just a technical fix. It is a creative workflow upgrade.
When playback is smooth, you make better decisions faster. You can test pacing, trim more confidently, and stay focused on story instead of fighting your hardware.
The key takeaways are simple:
- Use proxies when footage or hardware slows down your edit
- Build proxy creation into your ingest process
- Keep your file structure clean and predictable
- Always finish from the original media
If your next edit involves 4K footage, try setting up proxies before you make the first cut. Even one organized project can show you how much time and frustration this workflow saves.
SEO Details
Keywords: proxy video editing workflow, faster 4K editing, proxy media for creators, Premiere Pro proxy workflow, DaVinci Resolve proxy media
Meta title: Proxy Video Editing Workflow for Faster 4K Edits
Meta description: Learn how to build a proxy video editing workflow that makes 4K timelines smoother, reduces lag, and speeds up your editing process.
Suggested slug: proxy-video-editing-workflow-faster-4k-edits